AC Installation in Panama — What Nobody Tells You Before You Plug In the Unit
It's 2 PM in Costa del Este. The sun is hammering straight down on the concrete, the thermometer reads 91°F (33°C), and the humidity is sitting at 87%. Your brand-new mini split just arrived in its factory box, still wrapped in plastic. You're looking at it the same way you'd look at a Christmas gift. You're thinking: "I'll get this installed tomorrow and that's that."
That's where the trouble starts.
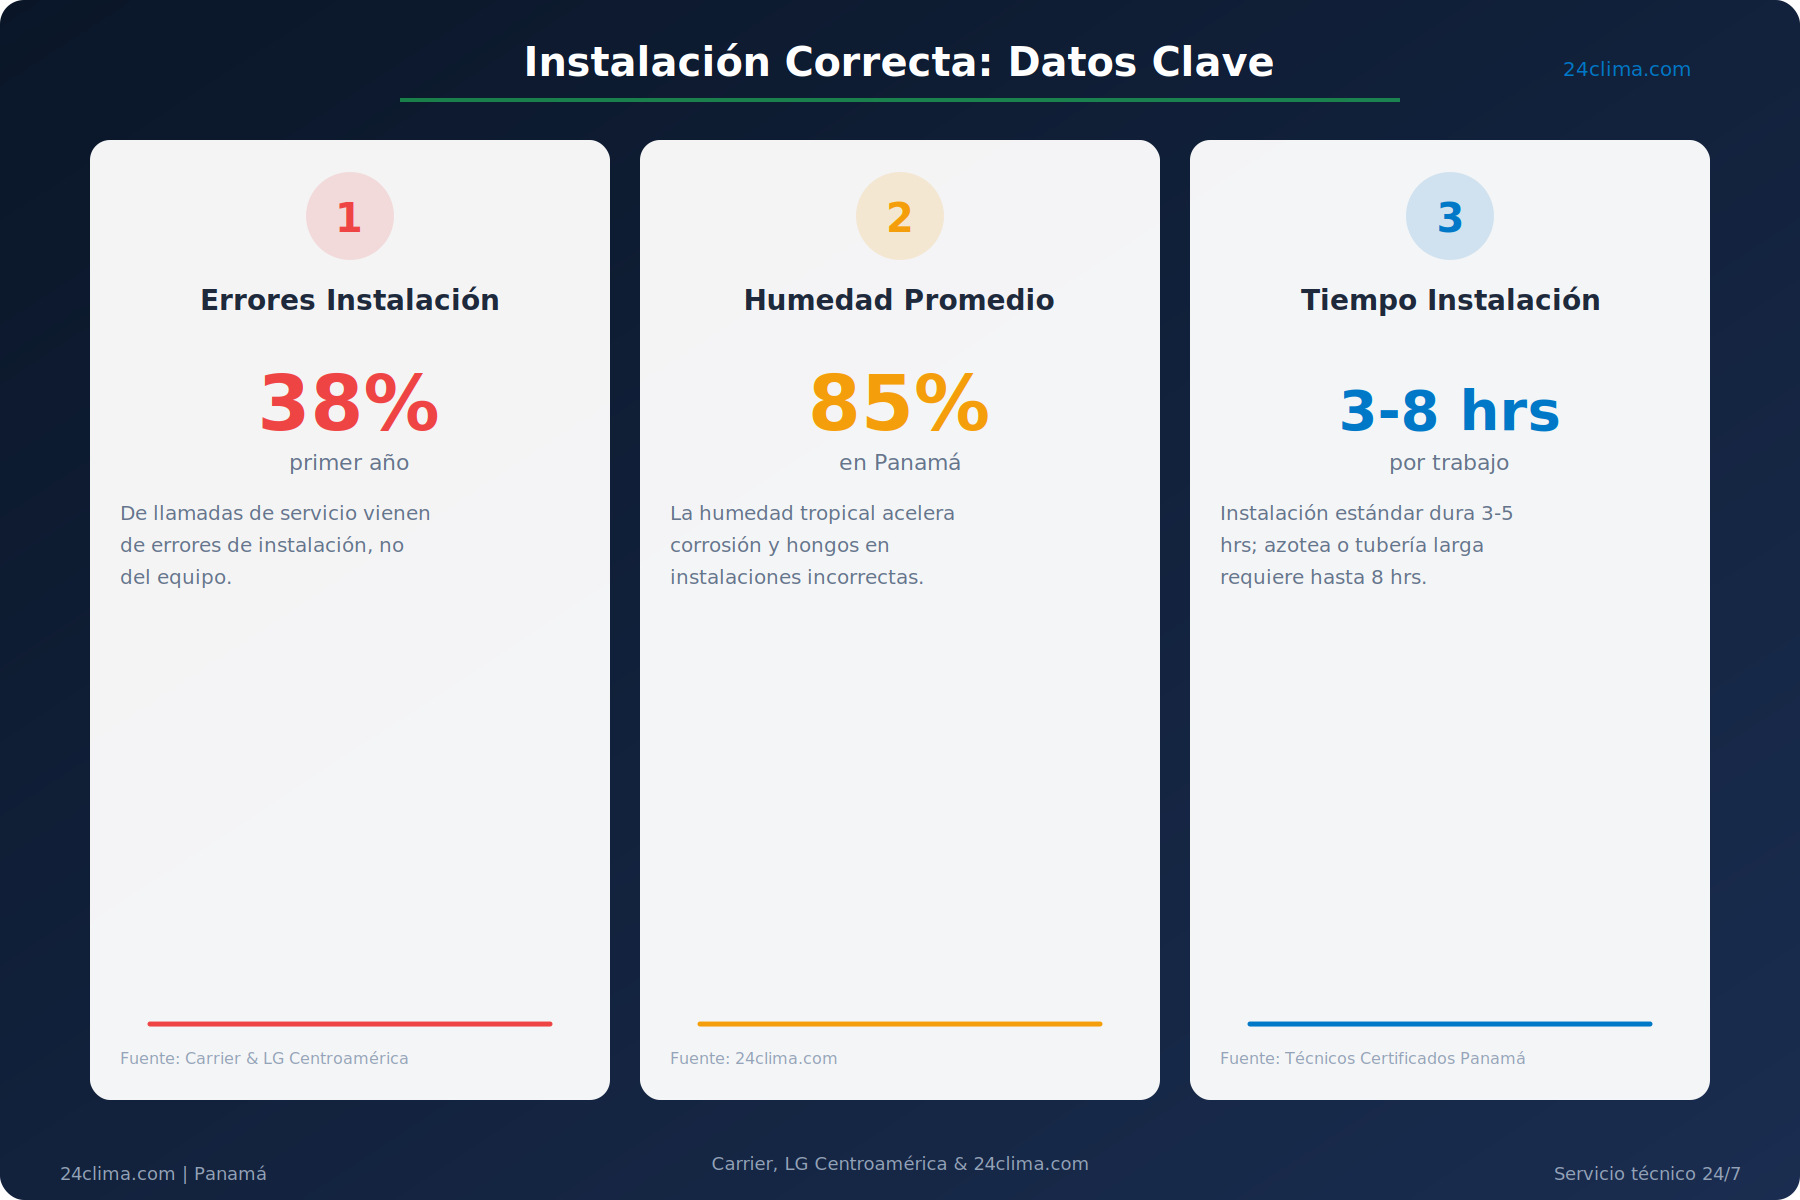
Most homeowners in Panama City buy the right equipment and then wing the installation. The result isn't the electricity savings they were promised — it's a drain line installed at the wrong angle dripping onto the ceiling, a compressor working twice as hard because the copper tubing has bad bends, or worse: a burned-out unit because the equipment was 220V and the outlet was 110V. In a tropical climate with an average humidity of 85%, installation mistakes don't take long to show up. They take exactly one rainy season.
This guide covers the complete process — real costs from the Panamanian market, technical requirements for 2025, and the mistakes a certified technician avoids from day one. For more on maintenance and installation, check out our guides at 24clima.com.
What You Think You Know About AC Installation (And Why You're Probably Wrong)
There's a belief that circulates endlessly in Panama housing Facebook groups: "installing a mini split is easy, any electrician can do it." Partially true. Completely dangerous.
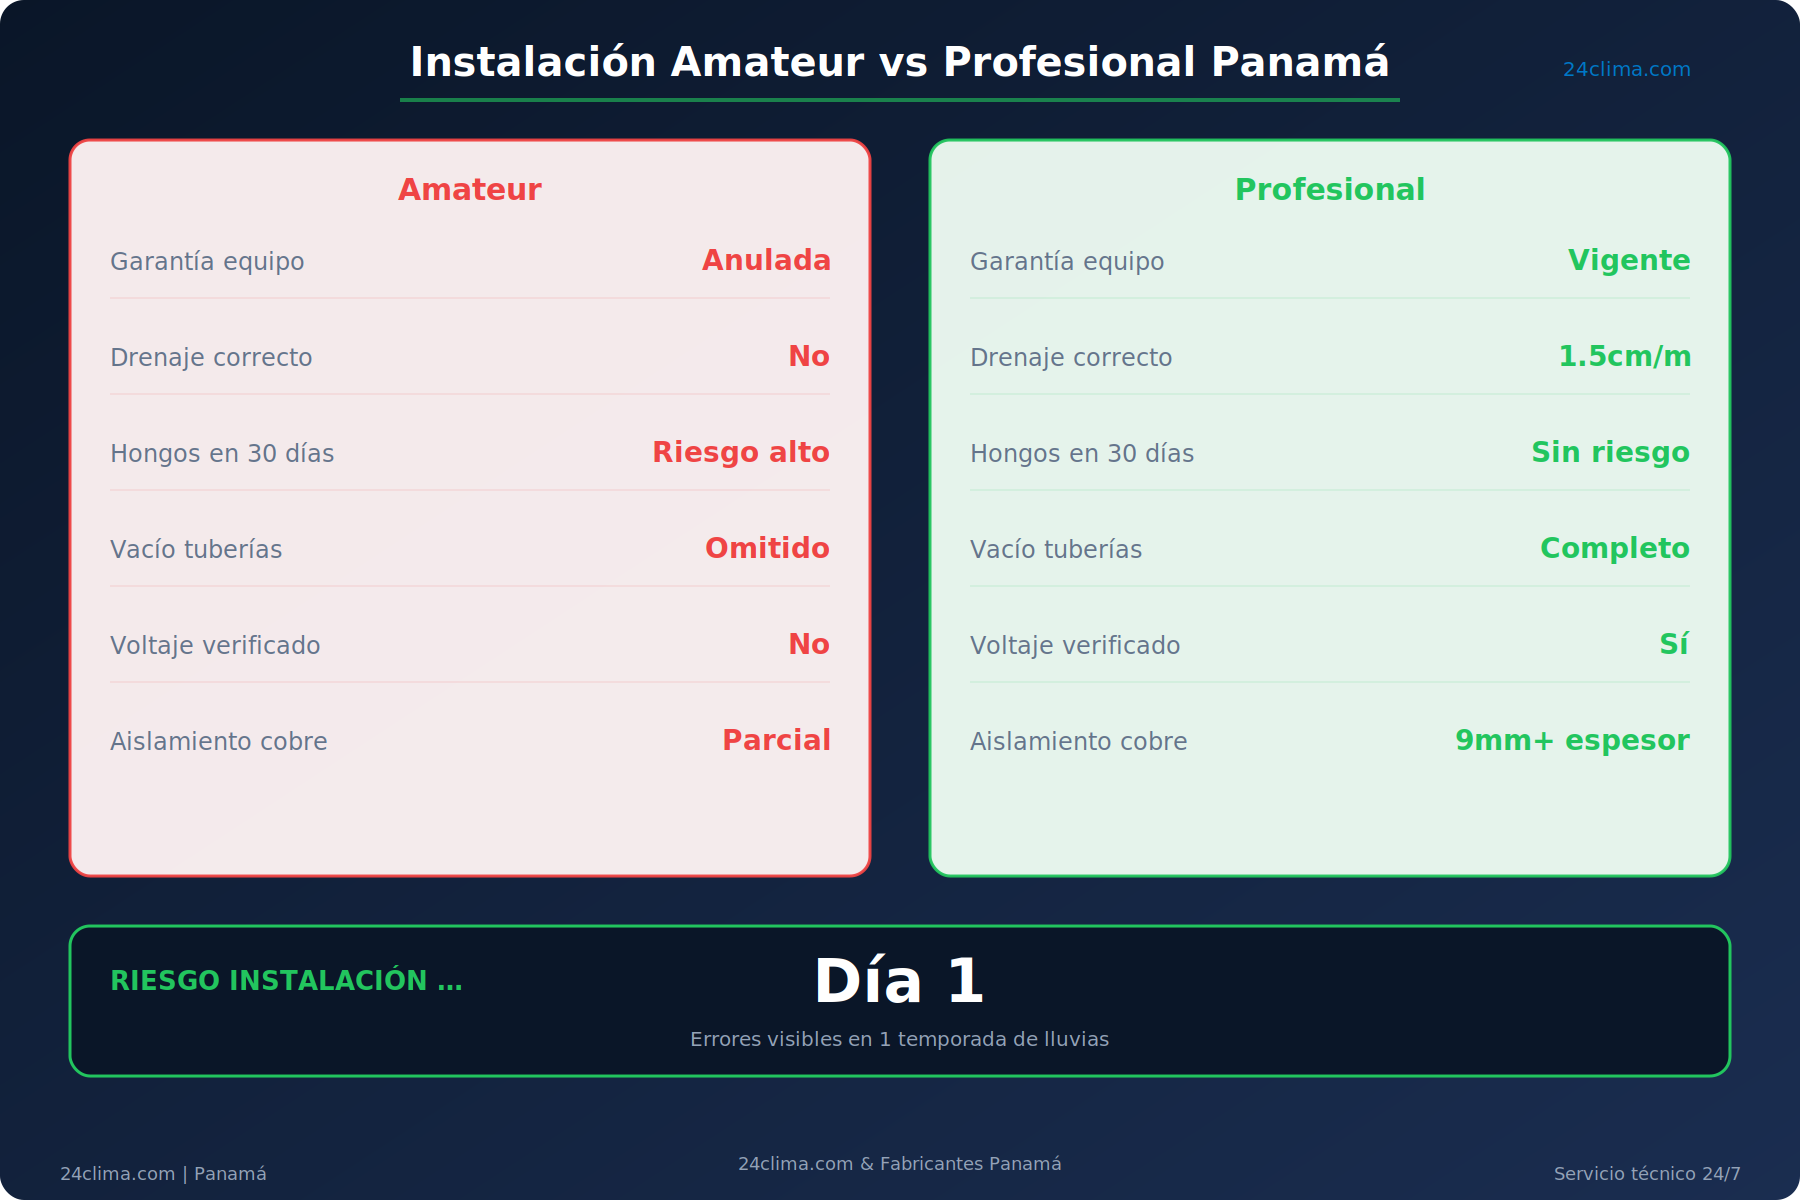
A general electrician can run the wiring. But mini split installation requires specific knowledge of refrigeration cycles, handling R-32 refrigerant, pulling a vacuum on the line set with specialized equipment, and calculating proper drain slope. That's four distinct disciplines. A mistake in any one of them doesn't just damage the unit — it voids the manufacturer's warranty from day zero.
According to data from Carrier and LG for the Central American region, 38% of service calls in the first year of a new unit's life originate from installation errors, not equipment failures. In Panama, where humidity accelerates corrosion and urban dust clogs filters fast, that figure is probably conservative.
A correct installation here has specific steps, specific materials, and a specific cost that is worth every dollar.
The 6 Steps of a Proper AC Installation in Panama
A professional mini split installation in Panama takes between 3 and 5 hours for a standard apartment setup, and between 6 and 8 hours if the outdoor unit goes on the roof or requires more than 16 feet (5 meters) of line set. Here's what a certified technician actually does, in order.
Step 1: Selecting the indoor unit location
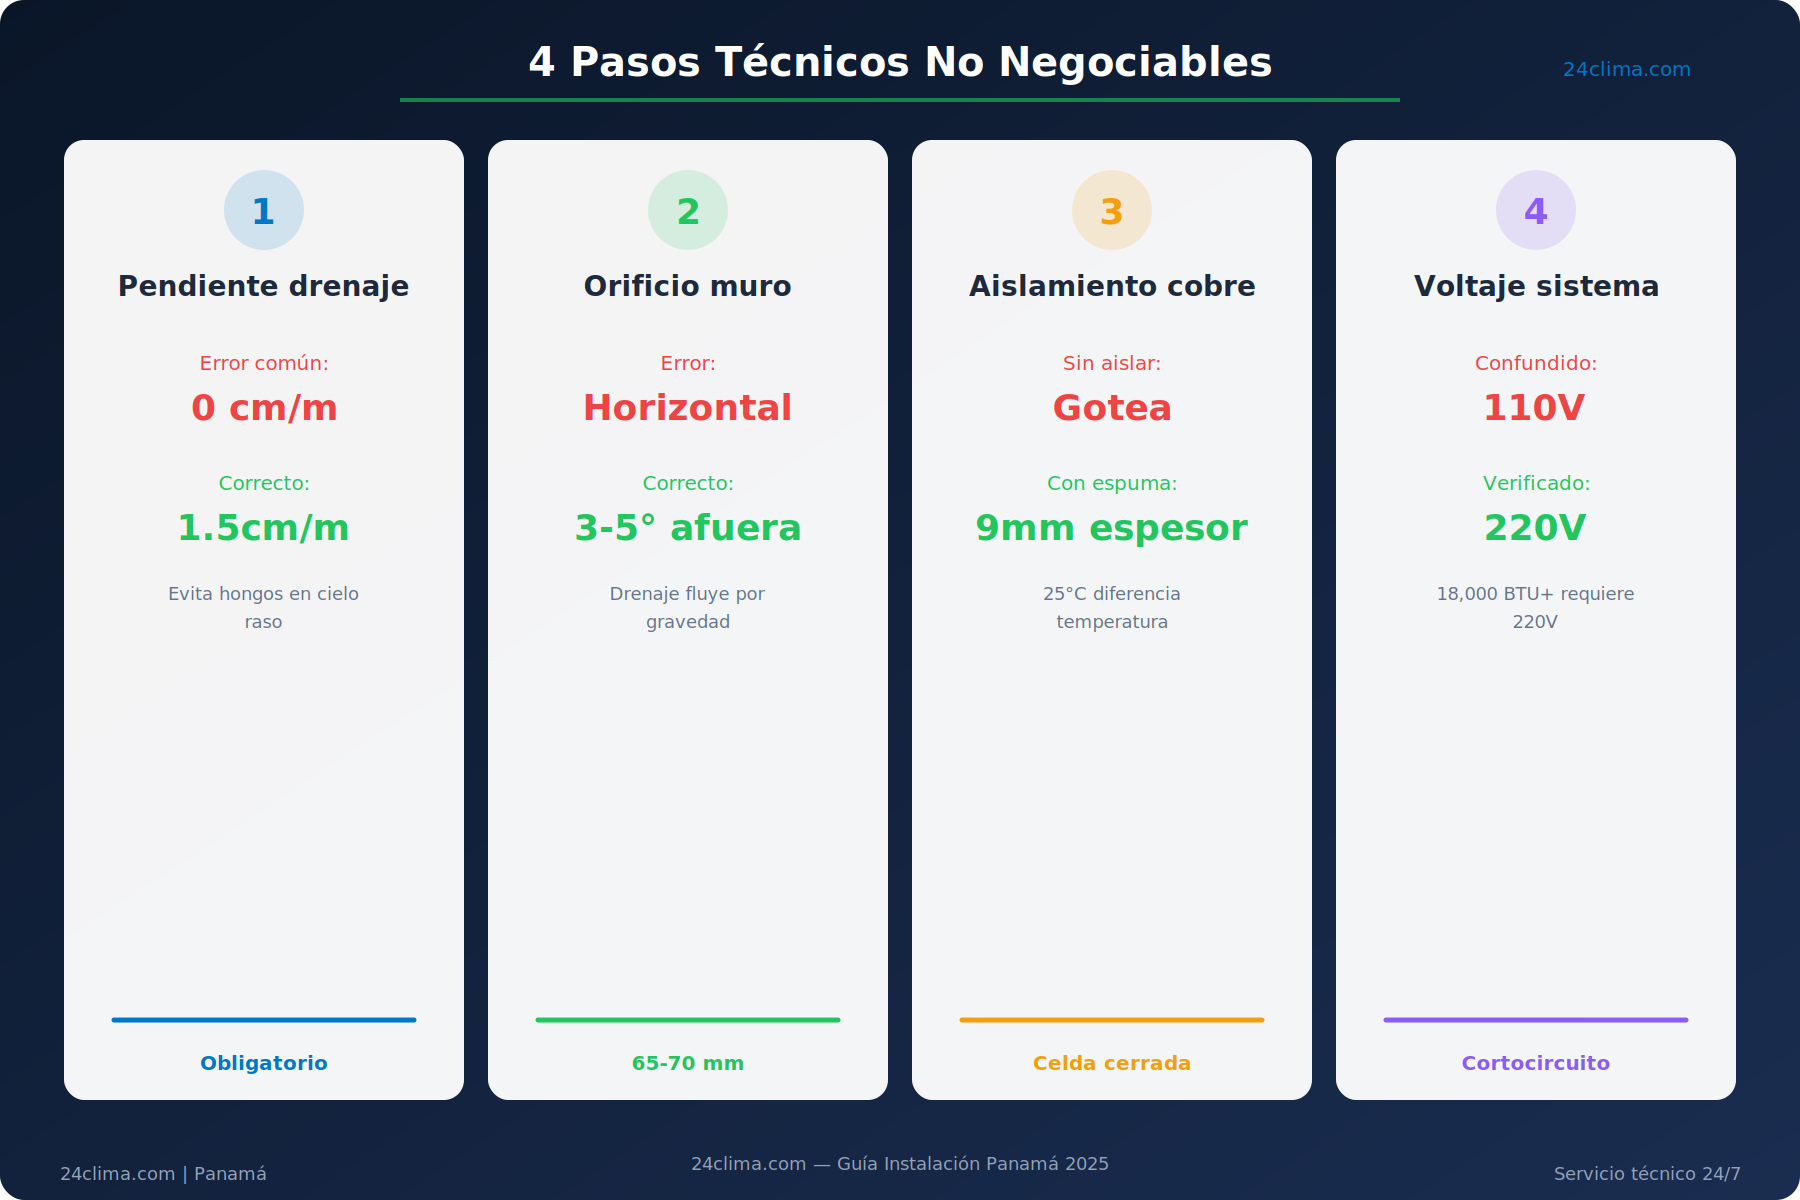
The indoor unit must sit at least 6 inches (15 cm) from the ceiling and away from direct heat sources — light fixtures, electronics, anything that radiates heat. In apartments in Punta Pacífica or San Francisco, where ceilings run about 8 feet (2.4 meters), this requires real planning. The drain line needs a minimum slope of 0.6 inches per meter toward the exit. On a high-humidity Panama day, that unit can drain up to 2 liters per hour — that slope is not optional.
Step 2: Wall penetration and line set routing
The hole through the wall needs to be between 65 and 70 mm in diameter and angled slightly downward toward the outside — 3 to 5 degrees — so condensate flows out by gravity. This is where one of the most common mistakes happens: the hole gets drilled horizontal or sloping inward, and condensate starts pooling inside the unit. In a tropical climate, that standing water produces mold in under 30 days.
Step 3: Installing the outdoor unit
The condenser needs at least 20 inches (50 cm) of clear space in front and 12 inches (30 cm) on the sides. It cannot go in an enclosed niche with no airflow exit — period. In Panama City buildings, technicians usually mount units on balconies or service patios, always checking that the structure can handle the weight (55 to 100 lbs / 25 to 45 kg depending on the model) and that someone can actually reach it for future maintenance.
Step 4: Copper line set connection and insulation
The copper tubing is the heart of the system. Standard diameters for residential mini splits run 1/4 inch on the liquid line and 3/8 inch on the suction line for units between 9,000 and 18,000 BTU. Every connection needs a perfect flare — an irregular flare loses refrigerant and you won't know it until the unit stops cooling months later. The tubing gets wrapped in closed-cell foam insulation at least 9 mm thick. In Panama, the temperature difference between the inside of the tubing and the outdoor air exceeds 45°F (25°C), which means any uninsulated section sweats heavily and soaks whatever's behind the wall.
Step 5: Electrical — 110V vs. 220V
This is where DIY installations go wrong in the most expensive way. Units in the 9,000 and 12,000 BTU range typically run on 115V/60Hz. Units at 18,000 BTU and above almost always need 220V with a dedicated circuit and a 20 to 30-amp breaker. Connecting a 220V unit to a 110V outlet doesn't just fail to cool the room — it can burn out the compressor in minutes.
Before buying any unit, verify the voltage of your existing electrical setup. If you live in an apartment built before 2005 in Panamá Viejo or El Cangrejo, there's a real chance you'll need to upgrade the electrical panel. That additional work runs between $150 and $350.
Step 6: Vacuum, refrigerant charge, and operational test
The most technical step, and the one most often skipped by cut-rate technicians. The technician connects a vacuum pump to the line set to pull out all moisture and air — the vacuum must hold for at least 30 minutes, and the final reading must reach -29.5 inHg or lower. Any residual moisture left in the system converts to acid that destroys the compressor from the inside out. You won't see any sign of damage until the unit fails 8 to 14 months later.
New units come pre-charged from the factory for line sets up to 16 feet (5 meters). Longer runs require additional R-32 refrigerant, added using calibrated manifold gauges. R-32 is the current standard in Panama for residential inverter systems — its global warming potential is 68% lower than the R-410A it replaces, according to the International Energy Agency (IEA, 2023).
How Much Does AC Installation Cost in Panama?
Installing a mini split in Panama runs between $80 and $150 for a standard job, depending on the area, complexity, and materials included. Rooftop work, extended line sets, or electrical upgrades push that above $200.
Current Panamanian market pricing (2025):
Panama City (Miraflores, Costa del Este, San Francisco) — Basic installation (up to 16 ft / 5 meters of line set): $100–$130 — Extended line set or rooftop outdoor unit: $140–$180 — Electrical upgrade included: $250–$350
Arraiján and La Chorrera — Basic installation: $80–$110 — With extension or additional work: $120–$160
Chiriquí and remote areas — Prices vary significantly; request a direct quote
These prices generally include basic materials — outdoor unit bracket, screws, sealant foam — but not always additional copper tubing, which runs approximately $4.50 per meter for 1/4 inch and $6 per meter for 3/8 inch.
One detail most technicians never bring up: the plastic conduit cover that protects the exterior line set costs an extra $8 to $15, but it's essential on west-facing balconies in places like Punta Pacífica. Without it, the foam insulation breaks down in 18 to 24 months under direct sun exposure.
To see the zones where we work, check out 24Clima's service areas.
Common Installation Mistakes in a Tropical Humid Climate
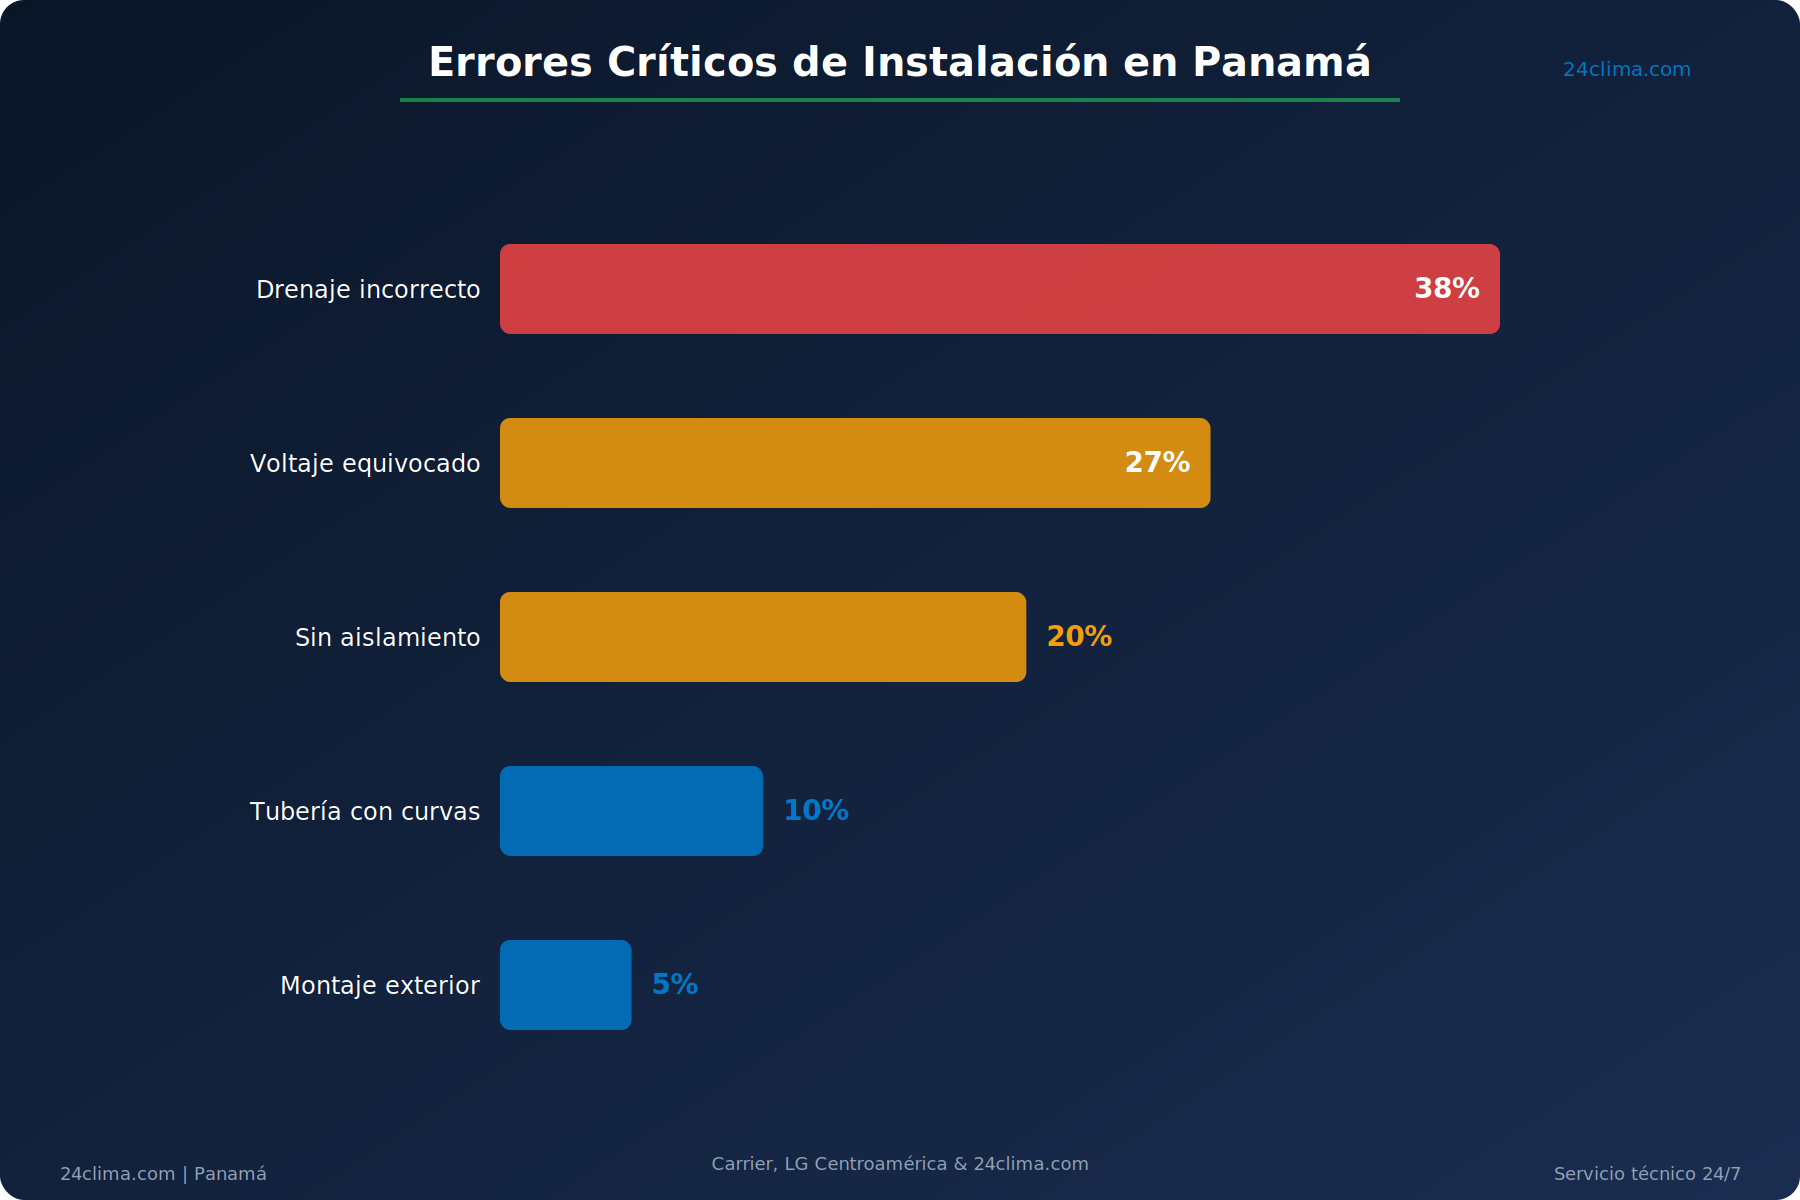
These are the four mistakes we see most often in Panama. Each one can cost between $200 and $800 in repairs within the first year.
Drain line with no slope or installed backward: condensate pools in the drain pan, grows mold, and eventually drips through your ceiling or down your wall.
Copper line set without complete insulation: any exposed section outdoors will sweat hard in Panama's humidity, soaking walls and rusting mounting hardware within months.
Skipping the vacuum before start-up: residual moisture in the line set destroys the compressor from the inside. The unit looks fine, works fine — until it doesn't, usually 8 to 14 months after installation.
Outdoor unit with no ventilation clearance: a choked condenser runs at elevated pressure, consumes 20% to 35% more electricity, and cuts compressor lifespan from 12–15 years down to 5–7 years.
If you want a diagnostic assessment of your current installation, use our online diagnostic tool to catch problems before they become expensive repairs.
Frequently Asked Questions About AC Installation in Panama
How long does it take to install a mini split in Panama?
A standard apartment installation with up to 16 feet (5 meters) of line set takes between 3 and 5 hours. Rooftop work, concrete slab penetrations, or runs longer than 16 feet push that to 6 to 8 hours. Any technician promising to finish in under 2 hours is almost certainly skipping the system vacuum — and that shortcut will cost you a compressor.
Can I install a mini split myself in Panama?
Technically yes, if you have solid knowledge of both electrical work and refrigeration plus the right tools. In practice, handling R-32 refrigerant requires a vacuum pump, manifold gauges, and a leak detector — and in Panama, R-32 is a regulated substance that only certified technicians can purchase. On top of that, most manufacturer warranties from brands like LG, Samsung, and Midea in Central America require installation by a certified technician. A DIY installation voids that warranty on day one.
What tools and materials are needed to install a mini split?
The minimum tool set: a drill with a 65–70 mm bit, a copper pipe bender, a flaring kit, a vacuum pump, a refrigeration manifold, a torque wrench, and a multimeter. Materials: 1/4 and 3/8 inch copper tubing, closed-cell foam insulation, plastic conduit cover, outdoor unit mounting bracket, 12 or 10-gauge electrical cable depending on voltage, and self-amalgamating tape. The tools alone run over $400 for a basic kit — which makes hiring a professional the economically smarter call for a single installation.
The Difference Between Cold and Cold Done Right
Back to that apartment in Costa del Este. Two scenarios: in the first, you called whoever someone recommended over WhatsApp, paid $70 because it was cheap, and three months later you have a moisture stain spreading across your ceiling and an AC that doesn't cool the way it did on day one. In the second, you put $120 into a proper installation — vacuum pulled, drain perfectly sloped, every inch of tubing insulated — and your electricity bill runs $25 a month lower than you expected because the unit operates efficiently from the very first cycle.
The installation isn't the extra cost that comes after buying the equipment. It's the part of the process that determines whether that unit lasts 5 years or 15.
At 24Clima we perform professional mini split installations throughout Panama City and the greater metro area, with certified technicians, guaranteed labor, and quality materials. Whether you just bought your unit or you're still deciding, contact us on WhatsApp to schedule the installation and get a no-obligation quote.