Your AC Is Leaking Water — Five Real Causes and How to Fix Them in Panama
It's 2 in the afternoon in Costa del Este. The sun hammers the city at 91°F (33°C) with 88% humidity. You walk into your bedroom, flip on the split unit, and instead of relief you find a dark stain spreading down the wall. Water. Dripping. A slow trickle running from the indoor unit and soaking the floor or whatever furniture is sitting underneath.
Your first thought: "My AC is broken." Your second: "How much is this going to cost me?" Most of the time, the diagnosis is simpler than it looks — and so is the fix. Water leaks are one of the three most common AC complaints we see in Panama, right alongside excessive noise and poor cooling.
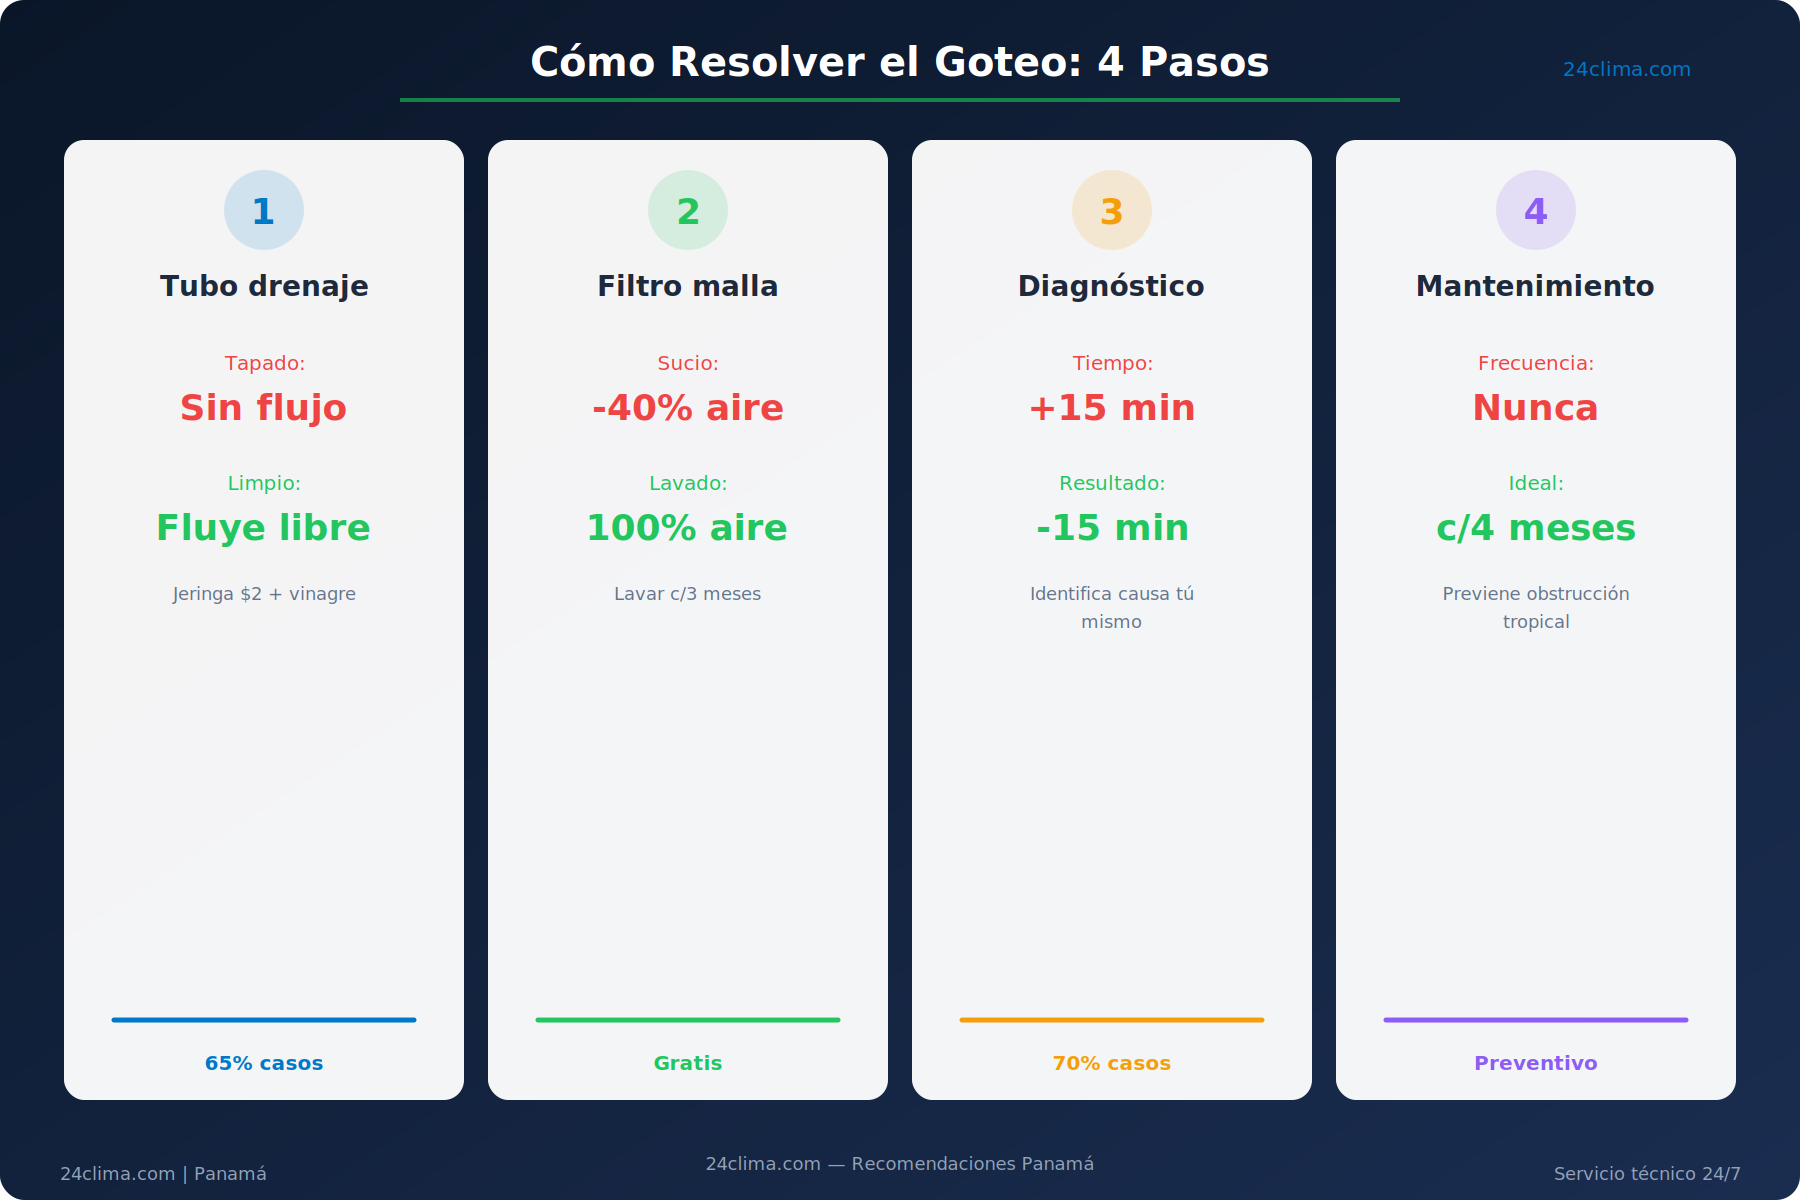
Before you call a technician or, worse, start shopping for a new unit, read this. In 70% of leak cases, the cause is something you can identify yourself in under 15 minutes.
What Most People Assume (And Why They're Wrong)
When your AC starts dripping, the instinct is to blame the refrigerant — the gas must be leaking. That makes sense on the surface, since the water is coming from inside the unit. But in nearly every case, refrigerant has nothing to do with it.
The refrigerant circuit is completely sealed. It doesn't mix with water. What you're watching drip is condensation — moisture pulled out of the air in your room, the same humidity that makes Panama feel like a steam room. That water is supposed to exit through a drain line to the outside or into a drainage point. When that process breaks down, the water backs up and spills into the room instead.
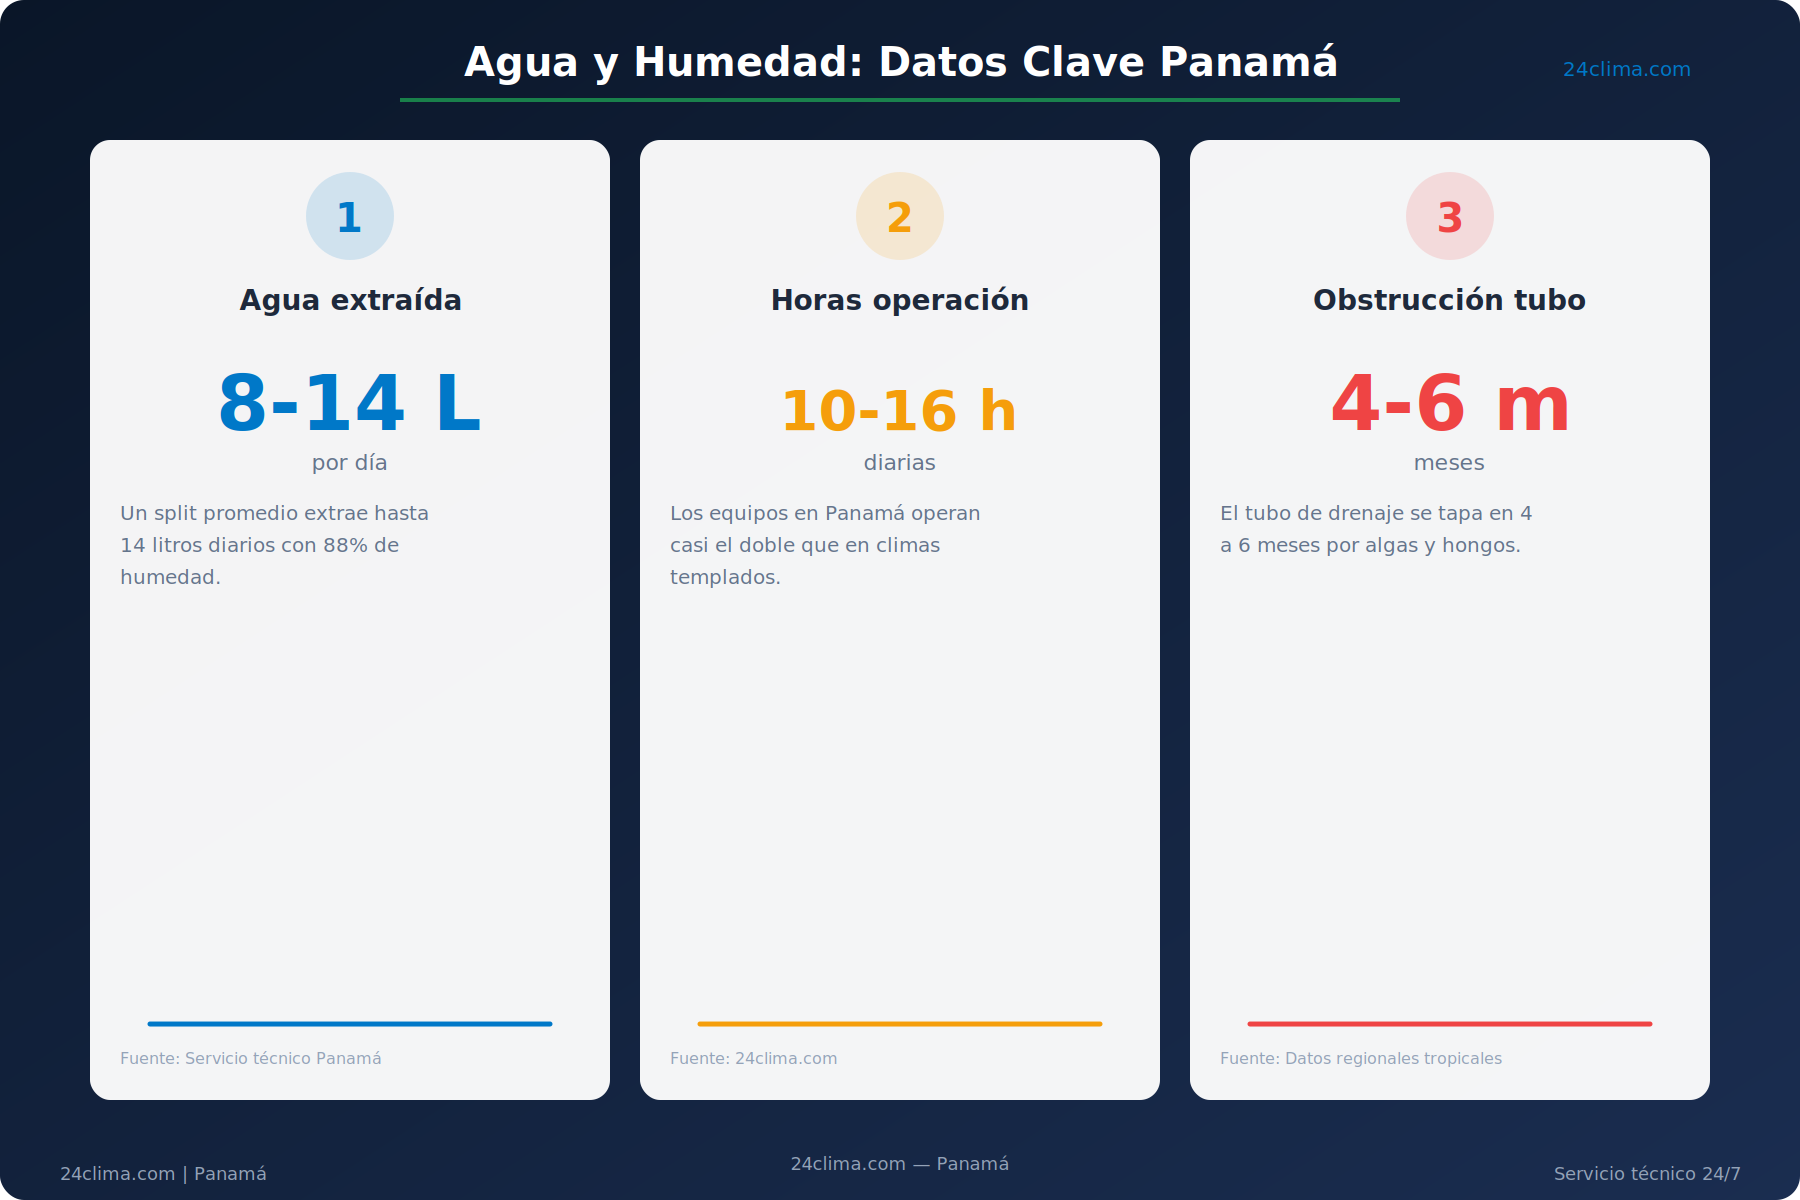
The pressure on that drainage system here is real. With relative humidity above 85% for eight months of the year and units running 10 to 16 hours a day, an average split pulls between 8 and 14 liters of water out of the air every single day. That's a serious volume of water for a drain tube the width of your thumb.
The 5 Main Reasons Your AC Is Leaking Water
Cause 1 — The Drain Line Is Clogged
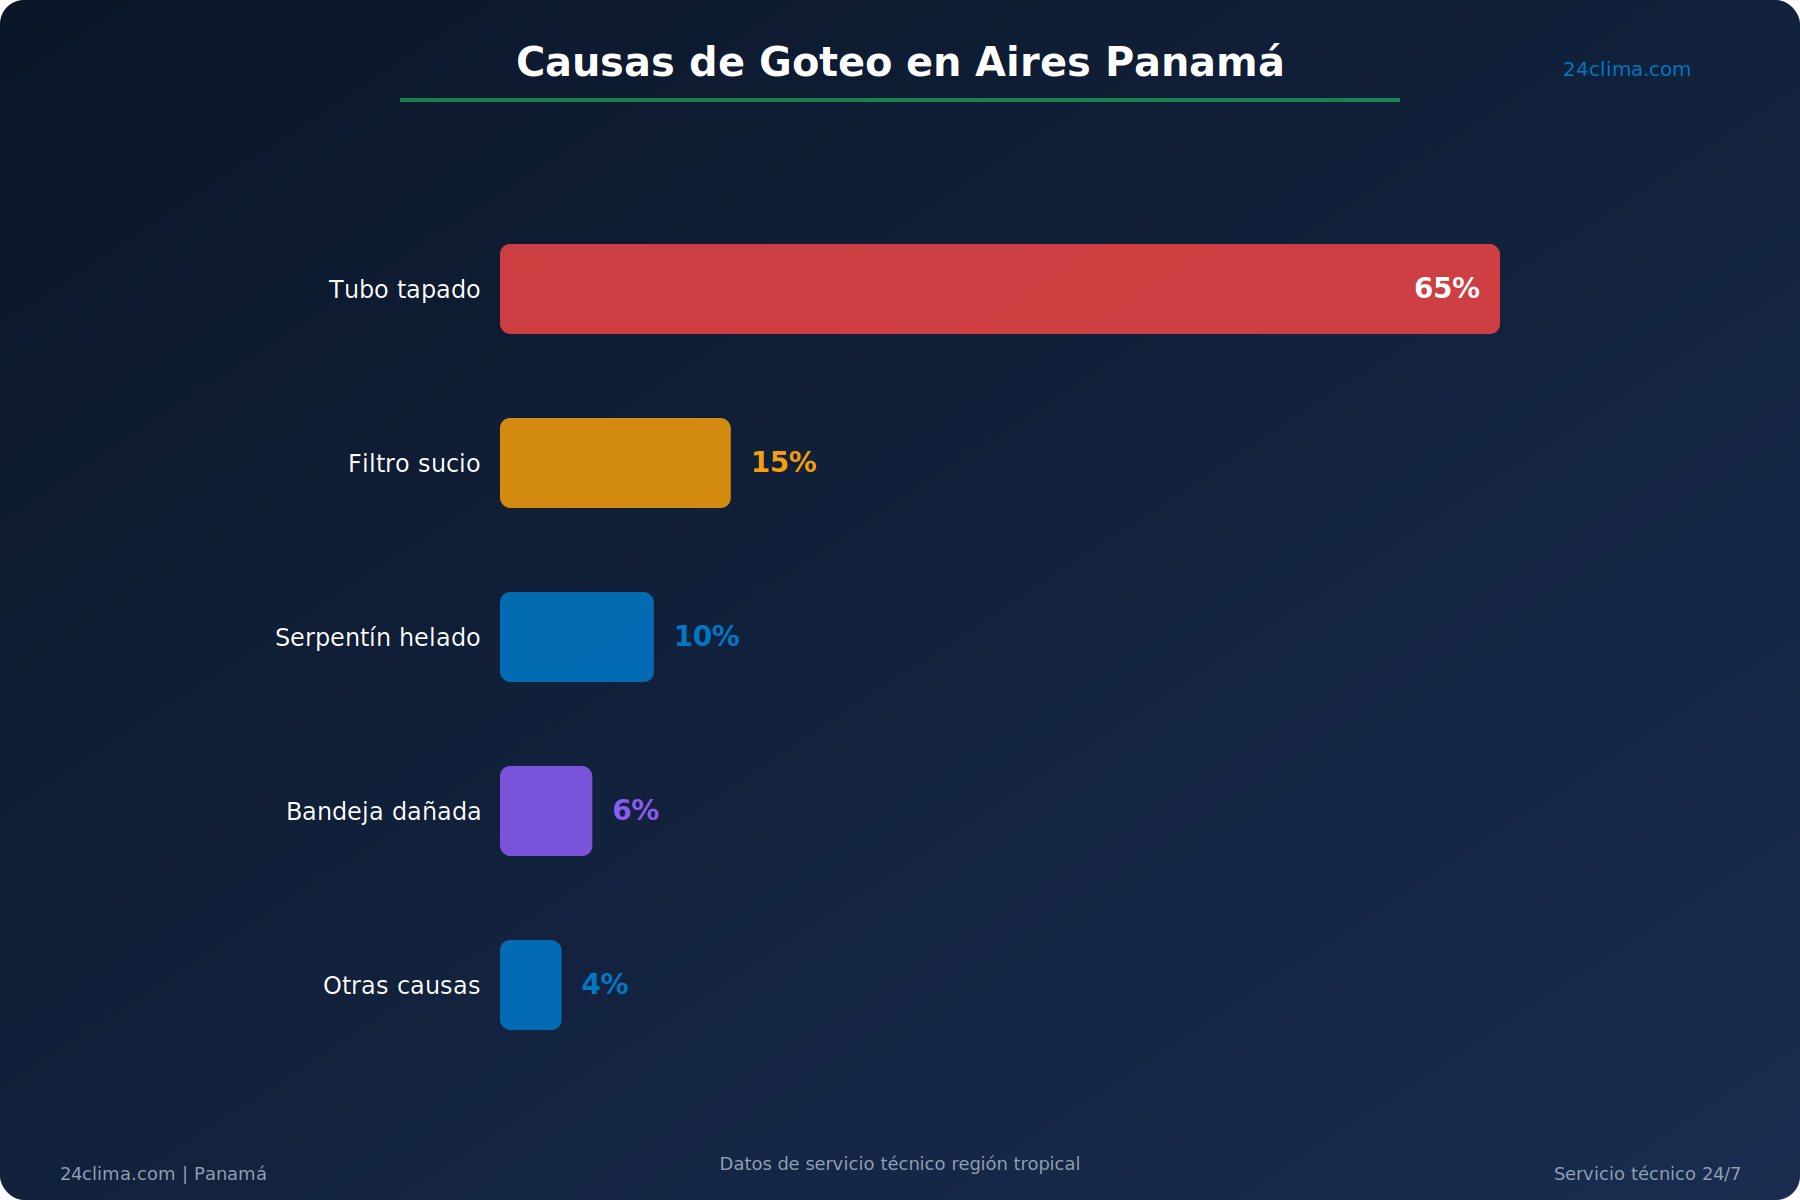
This is the number one cause in Panama, responsible for roughly 65% of residential AC leak cases according to tropical region service data. The drain line — also called the condensate pipe or drain hose — runs from the collection tray inside the indoor unit to an exit point on the exterior wall or into a building drain.
In Panama, that tube gets clogged by a combination of green algae, black mold, and biological sediment. The constant humidity turns the inside of the tube into a perfect environment for microbial growth. A tube that might go years without issues in a dry climate will partially block up here in 4 to 6 months if the unit is running hard.
How to check it yourself:
Turn the unit off and wait 10 minutes for any ice to thaw. Then locate the drain line coming out of the indoor unit — usually a thin white or gray PVC pipe, about 3/4 inch in diameter. Find the exit end of the pipe, which typically terminates at an exterior wall, in a bathroom, or at a floor drain. Blow into it with your mouth or a rubber bulb syringe. If air doesn't pass through freely, it's blocked.
How to fix it:
Pick up a large 60ml syringe — the kind used at veterinary clinics, available at most pharmacies for under $2 — or a small manual vacuum pump. Fill the syringe with warm water mixed with a teaspoon of white vinegar, insert the tip into the drain opening, and push firmly. Repeat three times. Then blow through with a rubber bulb to confirm airflow is restored.
If the blockage is stubborn, hold a household vacuum cleaner against the exit end of the pipe. The suction is usually enough to pull the clog out. This drain cleaning process is part of the preventive maintenance we recommend every 4 months in Panama's climate.
Cause 2 — The Air Filter Is Dirty
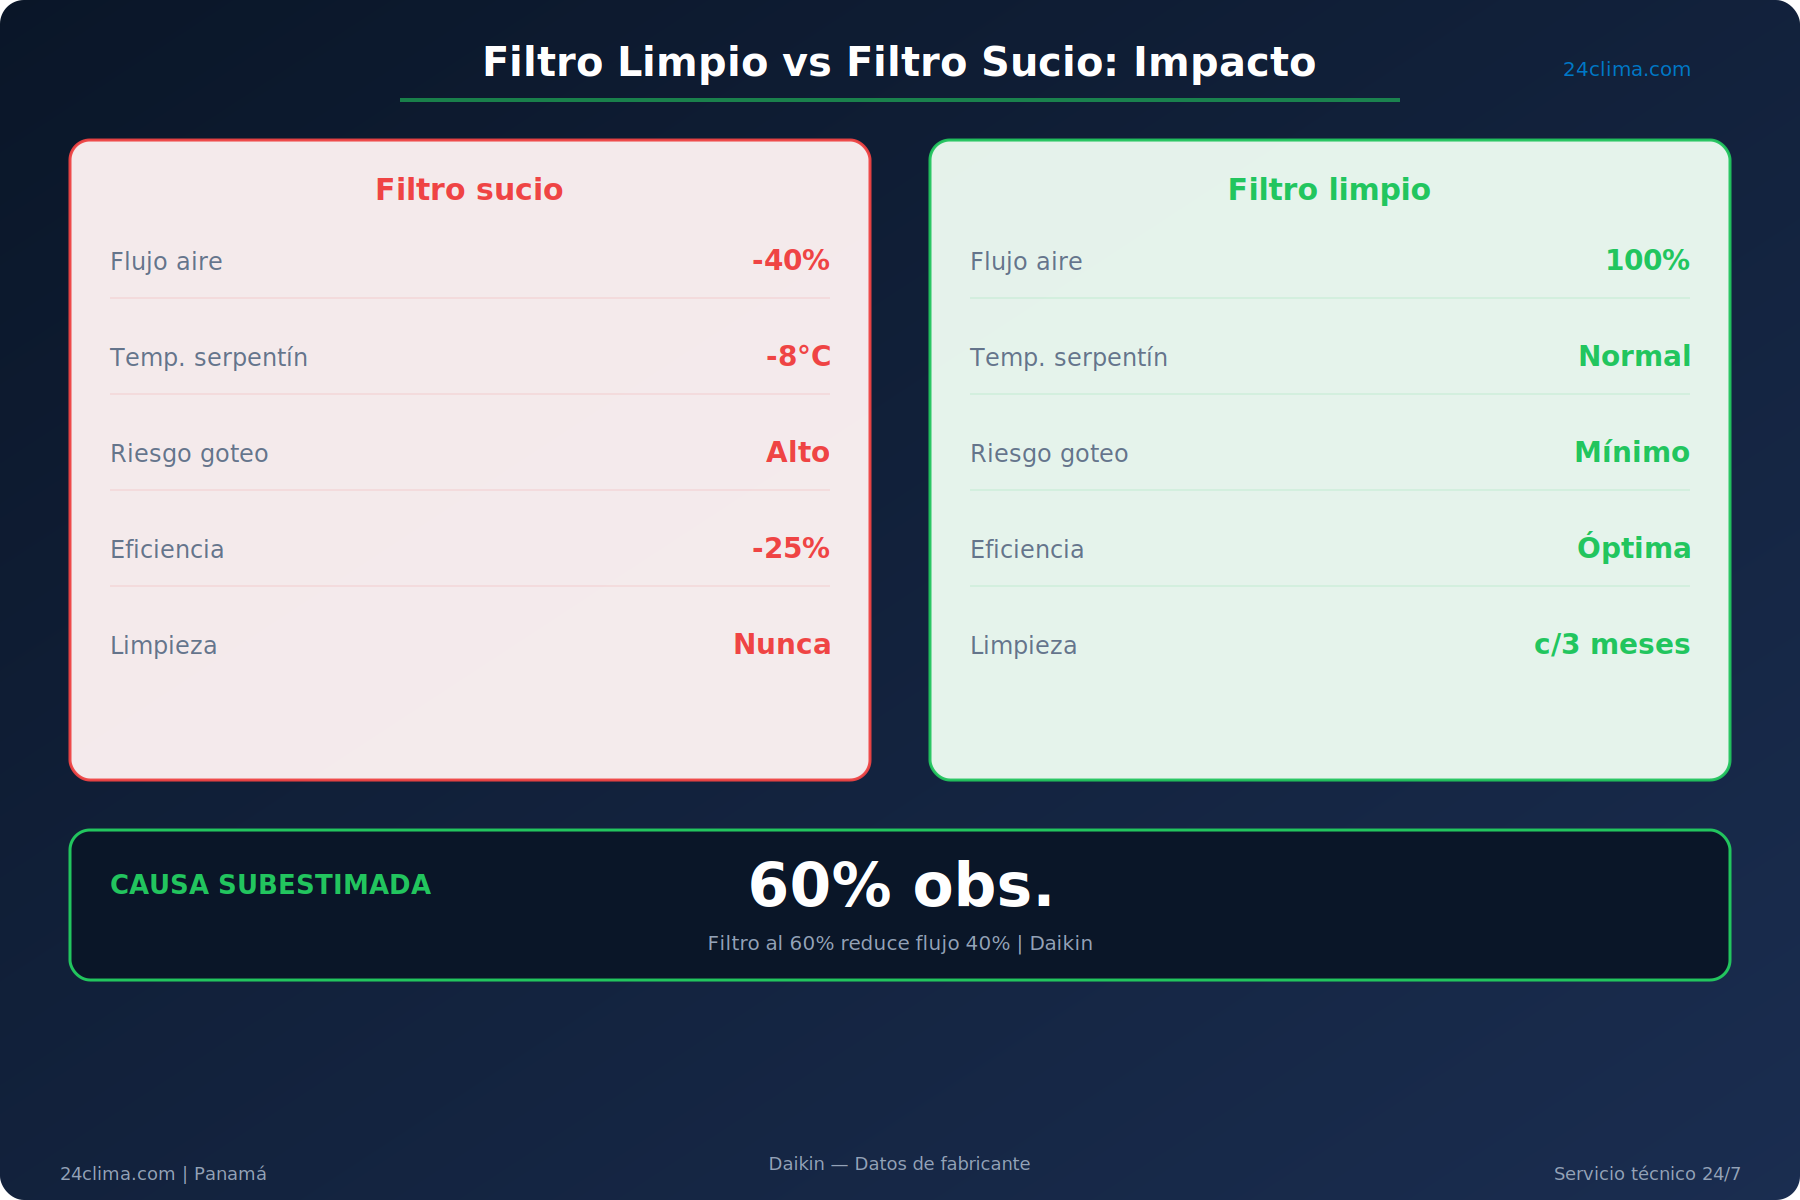
A clogged filter is the most underestimated cause of water leaks. Most people don't connect a dusty filter to puddles on the floor, but the mechanism is direct: when the filter is blocked, airflow across the evaporator coil drops sharply. The coil gets too cold — below freezing — and forms ice. When the unit shuts off or cycles, that ice melts all at once and the condensate tray can't drain fast enough. The result is overflow and dripping.
According to Daikin's manufacturer data, a filter blocked at 60% capacity can reduce airflow by 40%, dropping the surface temperature of the evaporator coil between 9°F and 14°F (5°C to 8°C) below its normal operating range. In Panama, where units run almost continuously, this situation develops much faster than in markets with cooler seasons.
How to check it:
Open the front cover of the indoor unit — it usually lifts upward without any tools. Pull out the mesh filters. They should look translucent or silver-gray. If they're dark gray, brown, or visibly coated in dust and fuzz, they need washing. Hold one up to a lamp: if light doesn't pass through easily, that's your answer.
Washing them is simple: warm water, mild soap, rinse well, and let them dry completely before putting them back. Never use hot water, and never reinstall wet filters. In Panama, wash the filters every 3 to 4 weeks if the unit runs more than 8 hours a day.
Cause 3 — The Indoor Unit Is Mounted at the Wrong Angle
This one is less obvious but comes up often with cheap installations or units that were shifted during renovations. The indoor unit needs a slight backward tilt — between 2 and 5 degrees — so that condensation water flows by gravity into the collection tray and out through the drain line.
If the unit is perfectly level, or worse, tilted slightly forward, water won't drain toward the tube. It pools at the front edge of the tray and drips straight into the room.
Check it with the bubble level on your phone — most smartphones include this in the compass app or in any free level app. Place the phone flat on top of the indoor unit. If it reads perfectly horizontal or shows a forward tilt, the installation angle is off.
Correcting it means loosening the wall bracket screws and adjusting the position. Someone comfortable with basic tools can handle it in 20 to 30 minutes. If you'd rather not get into it, a technician can knock it out in a short visit.
Cause 4 — Low Refrigerant Level
When the refrigerant level drops below the system's design range, pressure in the circuit falls. The evaporator coil runs colder than it should and freezes — even with a clean filter and good airflow. When it thaws, you get the same overflow situation as Cause 2.
This is not a DIY fix. You need refrigeration gauges and technical training to diagnose it properly. But you can spot the warning signs before picking up the phone:
The unit has gone more than 2 years without professional maintenance. Frost or ice is visible on the copper tubing connecting the indoor and outdoor units. The unit runs for hours but the room never reaches the temperature you've set. You hear hissing, bubbling, or gurgling sounds coming from the unit.
If two or more of those match what you're seeing alongside the leak, the drain line probably isn't the culprit. Shut the unit off and call a certified technician. Running a system with low refrigerant for extended periods can destroy the compressor — and compressor replacement in Panama runs between $250 and $600.
Cause 5 — The Condensate Tray Is Cracked or Blocked
The condensate collection tray is a plastic or metal pan that catches the water dripping off the coil. In units that are 8 to 10 years old, that tray can develop cracks, heat-related warping, or sediment buildup thick enough to block the drain opening — even when the external tube is completely clear.
This is more common in budget-brand equipment where the internal plastics don't have UV protection. Panama's heat and year-round humidity speed up the deterioration significantly.
Diagnosing it requires getting inside the unit: the cover comes off and the tray gets inspected directly. If it's cracked or the drain opening is scaled with mineral deposits, a technician will need to clean it or replace it. Condensate tray replacements in Panama typically run $15 to $45 depending on the brand and model.
Quick Diagnosis Table: Match the Symptom to the Cause
Symptom — Most Likely Cause
Constant drip, clear water, unit cools fine — Clogged drain line Water drips after the unit shuts off, possible ice on the coil — Dirty filter or low refrigerant Water dripping from the front edge of the unit — Incorrect installation angle Visible ice on copper tubing, weak cooling, plus dripping — Low refrigerant Drip with grayish water or musty smell — Deteriorated tray or biofilm buildup
When to Call a Technician Instead of Handling It Yourself
Some situations are beyond a drain flush and a filter wash. Call a certified technician if you see any of the following:
Ice or frost is visible on the copper tubing or the coil. The unit runs but the room isn't cooling even with a clean filter. You hear bubbling, hissing, or unusual clicking from the unit. You cleared the drain line and the leak didn't stop. The unit has gone more than 3 years without professional service.
These signs point to problems beyond drainage — low refrigerant, a damaged coil, or a compressor running outside its operating range. A DIY attempt in these cases won't just fail; it can make the damage worse and turn a $45 service call into a $400 repair.
If you want to understand what a complete professional maintenance visit actually includes and what to expect to pay, take a look at our air conditioning maintenance service at 24Clima.
Frequently Asked Questions
Why is my air conditioner leaking water into the room?
The water dripping into your space comes from normal condensation during the cooling process — the split pulls moisture out of the air and that water needs to exit through the drain line. When the drain is clogged, the unit is mounted at the wrong angle, or the coil freezes due to a dirty filter or low refrigerant, the water has nowhere to go and falls into the room instead. In Panama, the most common culprit is a drain line blocked by algae and biological buildup.
Is it dangerous when an AC leaks water?
The drip itself isn't an immediate emergency, but leaving it alone causes real damage. Water penetrates walls and ceilings, leading to structural moisture problems, black mold growth, and damage to furniture and electronics. If the underlying cause is low refrigerant and you keep running the unit, you risk destroying the compressor — the most expensive component in the system. Treat a water leak as a warning signal, not a minor inconvenience.
Can I fix the AC leak myself in Panama?
In most cases, yes. A clogged drain line, a dirty filter, or an incorrect mounting angle are all things you can resolve with basic tools and no specialized training. Low refrigerant, a damaged coil, or a deteriorated condensate tray require a certified technician. Either way, you can do the initial diagnosis yourself using the steps in this article — and that alone can save you an unnecessary service call.
The Leak Has a Fix. What Doesn't Have a Fix Is Ignoring It.
That stain on the wall — the one you spotted in Costa del Este, in Miraflores, in San Francisco, or in any Panama apartment where the split runs nonstop from January through December — has a specific cause. And in most cases, that cause takes 15 minutes to diagnose and an afternoon to fix.
Start with the drain line and the filter. If those two steps don't stop the dripping, look for signs of ice or weak cooling. If you find them, shut the unit off and call someone qualified. At 24Clima, we handle exactly these situations every day across the metro area. If you want a professional inspection or you're not sure what's causing the problem in your specific unit, contact us on WhatsApp and we'll walk you through it at no cost before scheduling any visit.